A Music Teachers Guide for Social Distancing
With schools closed and people working from home, online music lessons are an ideal way for music educators to continue offering lessons while practising social distancing. Plus, playing music is a great way for people to have a stimulating activity that can help them stay happy and creative during this time of uncertainty and self-isolation.
Teaching lessons online allows music teachers to connect far and wide, beyond their usual geographic location. Thanks to videoconferencing, our Musiprof teachers have been able to teach students from as far as Germany with just a simple internet connection.
The following post explains everything you need to know in order to get set up to offer online music lessons. Find out: which software to use, how to set it up, which cameras work best, what angles provide the best views, and which equipment you’ll need to optimize the online music lesson experience.

Getting students on board
Reach out to your students and see if they are interested in doing online lessons.
Ask them about which video conferencing software they have access to and help them get setup if they don’t know how to do so.
It might be a good idea to call them on the phone and guide them through the process.
Choosing your video-conferencing software
The most commonly used video conferencing softwares for online music lessons are: Zoom, Skype, or FaceTime. Whichever one you choose, it’s important for both student and teacher to have the same software while being live online.
Zoom

Zoom is free for one-on-one meetings, and it’s easy to use. To install the software, visit their website and click the “signup for free” button. Follow the instructions to create your account. In my opinion, Zoom is the ideal software for music lessons for the following reasons.
1: You can easily schedule meetings with your students in advance by clicking on schedule meeting or simply send an email to your student with your personal meeting ID. Once the link is clicked on by both parties, the meeting will begin. Easy as pie.
2: One the great features that Zoom offers is to easily record videos of the lesson. Students can then review the important parts of the lesson later in the week, which helps them remember.
To do this, simply hit the record button (as shown in the image below.) Once you’ve covered what you need, hit the stop button. You can do this as many times as you like throughout the lesson. Once the meeting is ended, the videos will automatically convert to mp4 and can be shared by email. (if the files are too big, use Google Drive or wetransfer.com to send them)

3: Zoom has a chat function that allows you to easily share links. This comes in handy for supplying students with materials during the lesson (such as sheet music, music theory, play-alongs or youtube videos.)
4: The share screen option is also handy for showing materials that you may have on your screen only.
Skype
![]()
Skype can be a good option, because it has been around for a long time and many people already use it.
Visit Skype and download the software for either Mac or Windows. Once your account is set up, search for your student by entering their name or email into the Skype search-box. (sometimes there are multiple people with the same name. Therefore, searching with email is more efficient.)
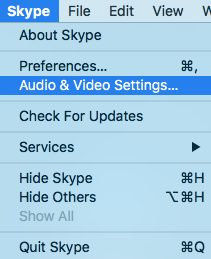
Testing the Audio Video Settings
It’s always a good idea to test the audio video setting before the lesson. This will help make sure that the camera angle is right and the microphone is working correctly.
To do this, click on Skype -> Audio Video Settings. Here You can select which camera you’d like to use as well as monitor your microphone levels.
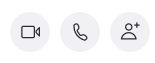
Once everything is working properly, go ahead and call your student by clicking on the video button on the top right side of your screen. Then, don’t forget to utter comprehensible sentences, because the person in front of you is really there! ;)
Face-Time
![]()
FaceTime is Apple’s video chatting software that is included in every iOS and Mac OS X device. It uses the same Apple ID users create to access Apple’s online services. (No version exists for Android or Windows) In addition to the Apple ID, people can add their other emails or their cell phone number to their FaceTime contact to be more easily reached.
Using Messages with Facetime
Facetime is joined with the Messages app and the Contacts app on both iOS and OS X. Inside the Messages app texting window, a video chat can be started by pressing on the person’s name in the top right hand corner and selecting the Facetime Video option. In your Contacts app, it is in the “call” section under a person’s name if they are iOS/Mac OS users.
Within Facetime, new chats are started by entering a person’s name, email or number in the search tab on the upper left, which is connected to your Contacts app. Add your student’s in your Contacts, and you can initiate video chats easily.
Using a built-in computer camera or an external one
In many cases, using your built-in camera will do the trick for online music lessons. With small instruments such as guitar, bass, flute, saxophone, or voice, the built-in camera will allow both the teacher and student to properly see each other and their instruments.
For bigger instruments like the drumset or the piano. It could be helpful to set up an external secondary camera in order to get a better view of the instrument, and then switch between the two cameras as needed.
Using your iPhone or Android as a Webcam
The easiest and cheapest solution for setting up an external webcam is sitting right there in your pocket. That’s right, you can quickly set-up your smartphone as an external camera to provide a secondary viewpoint of your instrument. For example, this might come in handy for setting up an overhead view of the piano.
Step 1: You’ll need to install an application on your smartphone as well as your computer that allows the two to communicate with each other. Visit http://www.kinoni.com/ and download EpocCam for IOS or Android. For Mac Users, download and install the drivers for macOS 10.12 (Sierra) or later AS WELL as EpocCam Viewer for Mac App Store. For PC users, download and install the drivers for Windows 7 or later.
Step 2: Once the drivers are installed on your computer, go to the app store on your smartphone and install the EpocCam application. There is a free version or a paid version ($10.99.) The paid version provides HD resolution, allows you to mirror the image, and gives access to your phone’s light (which comes in handy.)
The phone will then connect to your computer through wifi or USB (USB connection is required for Mac OS X / IOS.)
Step 3: When you launch Zoom or Skype, in the audio video settings, you can now switch between your computer’s built-in camera and the EpocCam on your phone.
Equipment for holding up your smartphone
You’ll have to figure out how to fasten your smartphone before you can start using it as an external webcam. We’ve put together a list of equipment options for you to get started.
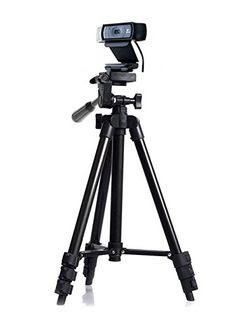
If you already have a camera tripod, a simple clamp style holder will grip the smartphone and screw on to the tripod.
Since many musicians already have boom microphone stands, smartphone holders like the below two are practical. They hold phones up to 3.5” (8.9cm) wide and clip on to the microphone stand.
If you are using a tablet for the video chat, which brings the advantage of a larger screen to see each other with, then you’ll need a larger holder such as the ones below by On-Stage that can hold phones, mini-tablets and full size tablets. All models include 3 holders in small/medium/large sizes, a ball-joint adapter to get that perfect angle, and a quick release adapter to move the holder from one clamp to another.
There are 3 clamp options:
If you have multiple clamps setup, with the quick release you can easily move the holder from clamp to clamp to offer the different views for the students. Ie. full body/instrument view to closeup view of hands/instrument.
Higher Quality Webcams
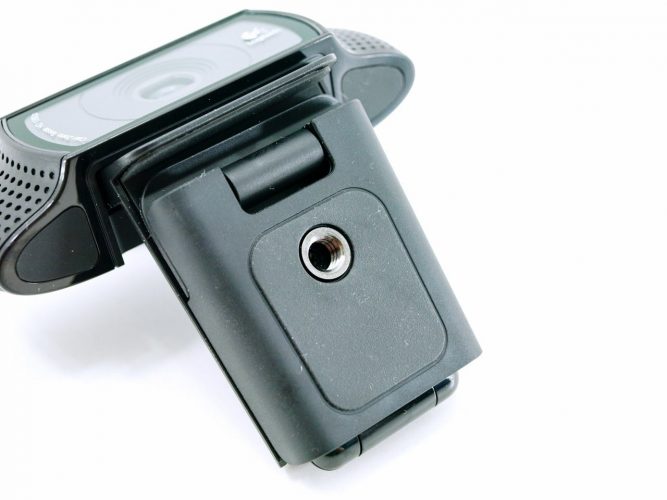
Another great option (though more expensive) for an external webcam is the Logitech HD pro webcam for $200-$300 (new or used.) It features HD video quality with 2 built in microphones on each side of the camera. If you want the best possible sound for your music lessons, this could be a good choice for you. To connect it to your computer, all that you need to do is plug it into the USB port and you are good to go.
Where to place your camera
This camera has a flap that allows you to place it on top of your desktop computer.
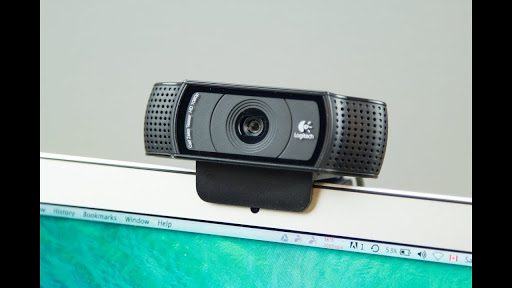
Alternatively it has a screw that allows you to attach it to a tripod and move around to get a better angle. The cable is about 5 feet long, which allows it to be moved easily.
Optimal Camera Angle for Piano Lessons
Side view: Many piano teachers agree that the best angle to set up your camera for online lessons is on the side.

This angle works best because it allows the teacher and student to get a view of the keyboard while being able to see the movements of the wrist (which is important for technique.)
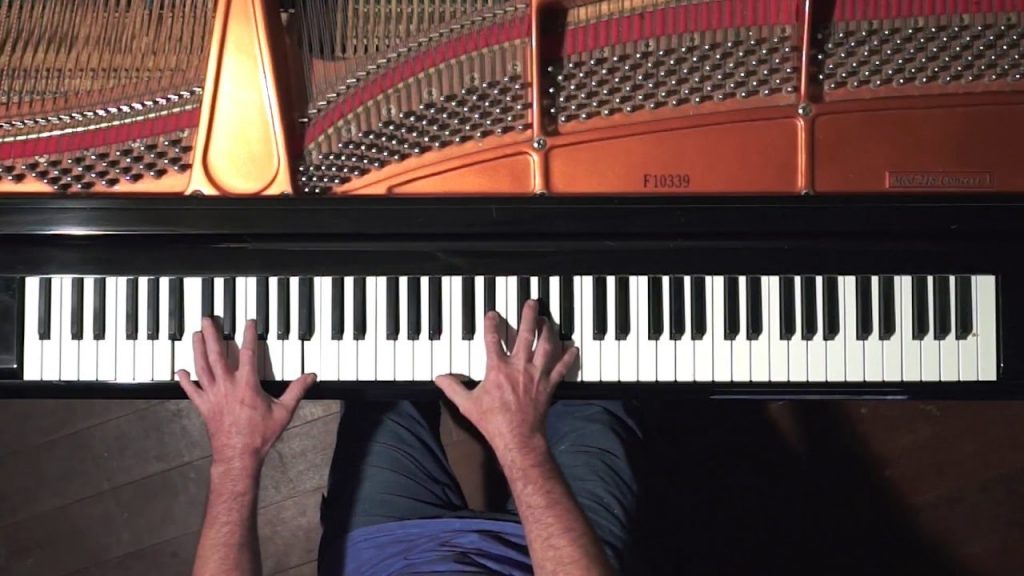
Overhead View
Another interesting perspective is the overhead view. This view provides a great line of sight for fingering as well as the specific notes that are being played. It does not however offer a good view of the wrists or how to use proper technique. This view requires an external camera and a special setup to mount it overhead.
In an ideal situation, the main camera can be placed on the side, while an overhead camera is set-up overhead. The teacher can then switch views in their video conferencing software at the appropriate times.
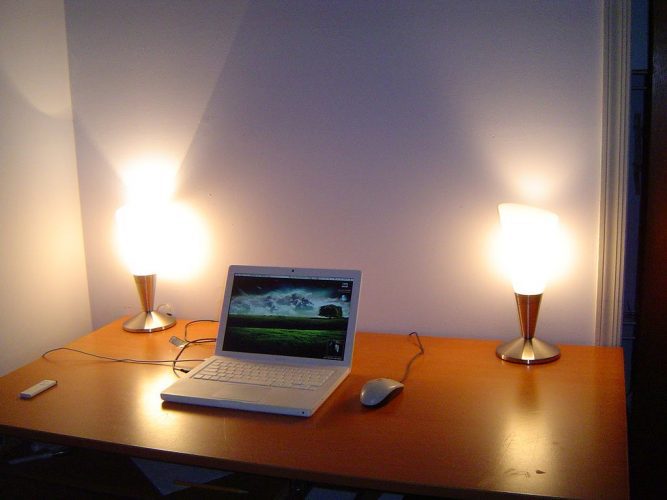
Good lighting is important
It is important to think about lighting when getting set up for online lessons. Often simply positioning yourself to face the natural light of the window will do the trick. Alternatively, a table lamp can help remove the shadows caused by ceiling lighting and provide better visibility of the face and instrument. Generally speaking, a dark background will make the camera expose for a brighter face, while a white background will make the camera underexpose for a darker face. Experiment with different curtains and backdrops as well as lighting options.
Setting Up Online Drum Lessons
Visit our recent post for more information on getting setup for online drum lessons.
Choosing a headset
If the sound quality of your computer speakers and microphone is less than ideal, you might want to consider purchasing a headset with a built in microphone to improve your online music lessons. It goes without saying that having proper sound transmission is crucial for music lessons.
Low priced headset
The Logitech Clearchat Stereo Headset $42.99 is a great and affordable option that will greatly improve your teaching experience.
Using an external Microphone
Desktops / Laptops: To extend the capability of your laptop or desktop for video lessons, consider using an external USB microphone to capture better sound. These microphones integrate seamlessly into the various programs, offer better sound capture and allow closer microphone placement. Here are two options in different price ranges.
Smartphones / Tablets: While headphones or earbuds are mandatory for an acceptable music listening experience, often the built in microphone on the smartphones/tablets are good enough for lessons. If you yearn for a better sound input from your phone/tablet consider using a simple mono microphone which could offer better mic placement and capture experience. These connect to the phone with a 3.5mm TRRS plug (iPhone 6 and later users must use the adapters included with their phones.) The below item has a 78 inch long cable (2m) to allow the mic to be closer to the sound source, while the camera is further away for an ideal video frame.
This below mic is similar in function, but connects with the Apple Lightning connector and has a 1.5m cable (59”).
Make sure to charge your batteries before the lesson. Video chatting drains the battery quickly.
To keep the iPhone/iPad plugged and charging while using headset, headphones, or external microphone, Apple users should use a product that will split the lightning connector.
Users of Android products or iPhone SE / iPad with built in 3.5mm ports, can charge and call using headsets at the same time without adapters.
After reading the article, you may be wondering if it’s possible to make money making music, even if you’re not famous?
In this article published by Backonstageapp.com, you will learn The 7 Best Ways To Make Money as a Musician Without Being Famous
To Conclude
The above descriptions and links are to help you get started with online music lessons. Many teachers offer solutions already for these issues with equivalent gear. Use whatever works for you. If you have a system that is already up and running, great for you. Please send us a message detailing it and we’ll share it with the others.