Download the guitar strumming patterns PDF file.

This beginner guitar strumming patterns PDF will help you develop your ability to play interesting right-hand strumming patterns on the guitar. In this article, I will deconstruct each pattern to improve your understanding.
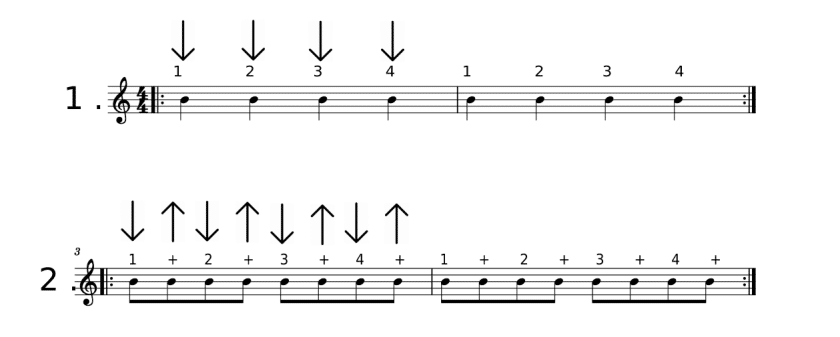
Strumming Pattern #1
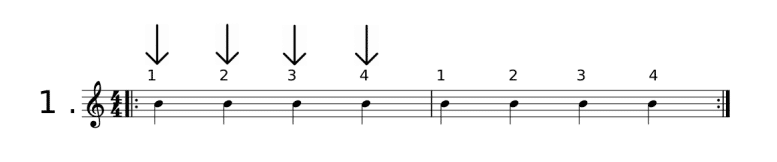
This first strumming pattern uses what we call “quarter notes.” This is the basic subdivision used in music. Each note or strum is worth one count.
When to use this guitar strumming pattern?
This basic strumming pattern can be used when first learning a new guitar song, or to simply work on chord transitions. With practice, another more advanced pattern can be used.
How to practice?
To practice this strumming pattern, choose a chord that you know well. For example the Em or G chord. Then, with a pick or the nail of your index finger, play the 6 strings of the guitar using a downward movement starting at the top and ending at the bottom (down strum). Count 1, 2, 3, 4, and make sure you hit all 6 strings of the guitar.
I’m a beginner, which chord can I use?
I suggest checking out our First 4 Chords to Learn on Guitar article, to learn some basic chords to use with the patterns in this article.
How to angle your pick
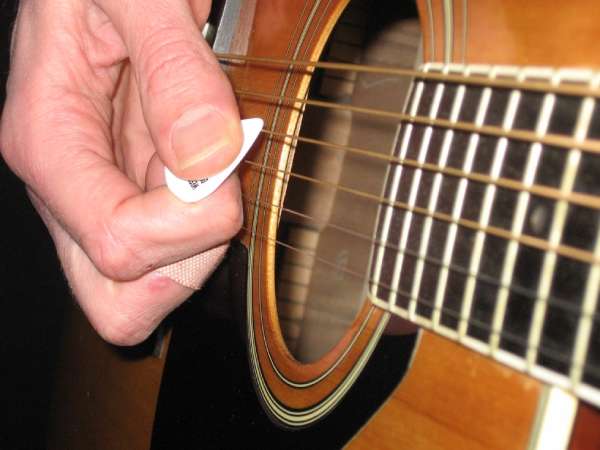
Make sure the pick is angled upwards, to ensure you hit all the strings of the guitar. *If the pick is too perpendicular, you risk getting stuck on certain strings or strumming harshly.
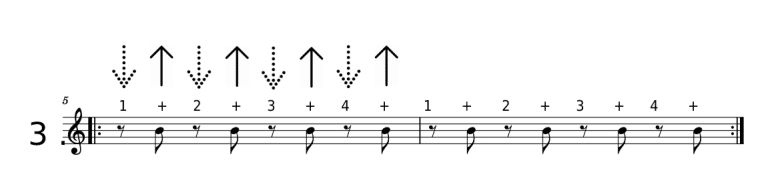
Strumming Pattern #2
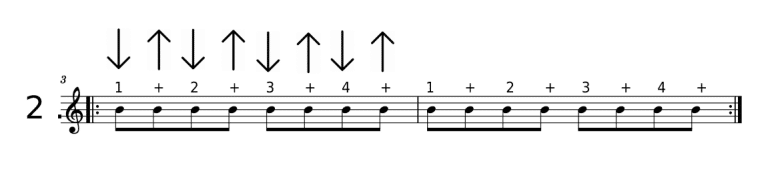
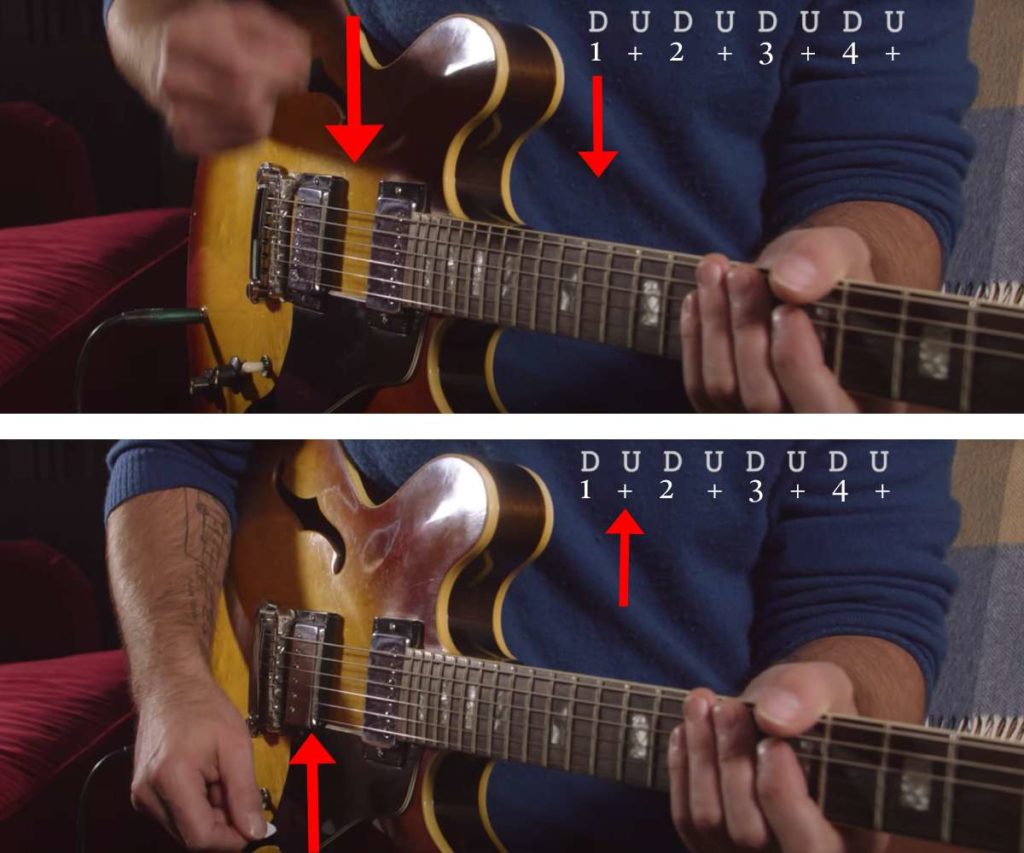
This guitar strumming pattern uses what we call eighth notes. This means that the notes go twice as quickly as the quarter notes (see strumming pattern #1). To play eighth notes easily, we will use a downward movement, followed by an upward movement. See this video for more explanation.
- Make sure you hold the pick flexibly and touch the 6 strings of the guitar.
- Avoid playing too hard
- Practice slowly
Combine strumming pattern #1 and #2
After you have practiced strumming pattern #2 and you are comfortable with it, try moving from exercise 1 to 2 without stopping.
Notice that the up and down hand movement is the same for both exercises. The only difference is that in exercise 2, we touch the strings while moving upward. When played in time, pattern #2 (eighth notes) and pattern #1 (quarter notes) fit right into each other. In other words, there is exactly 2 eighth notes for each quarter note.
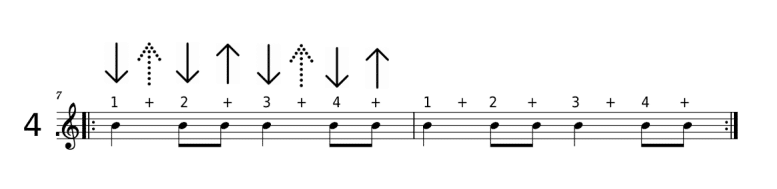
Strumming Pattern # 3
Strumming pattern #3, primarily used as an exercise, helps you focus on upward movements. Count 1 +, 2 +, 3 +, 4 + out loud and align your upward movements with the “and.”
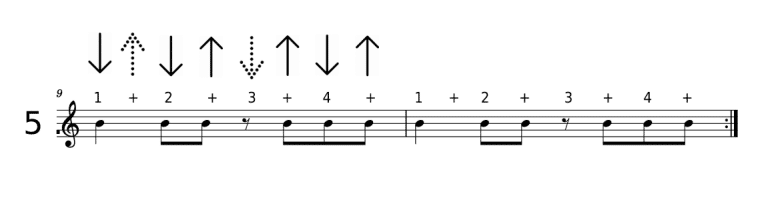
Strumming Pattern #4
From here, you’ve mastered your basics, and now it’s time to start playing more interesting rhythms on the guitar. To help you “hear” strumming pattern #4, I suggest starting by clapping and counting.
Strumming Pattern #5
After learning the rhythms in this article, as well as some beginner chords, you are now ready to learn your first beginner song on guitar.
In Conclusion
I hope this article has helped you develop your rhythm guitar skills. See our article 6 Easy Guitar Songs for Beginners with Chords to learn your first song on the guitar.